
Halloween Chocolate Cookies: Easy Spooky Recipe (Makes 24)
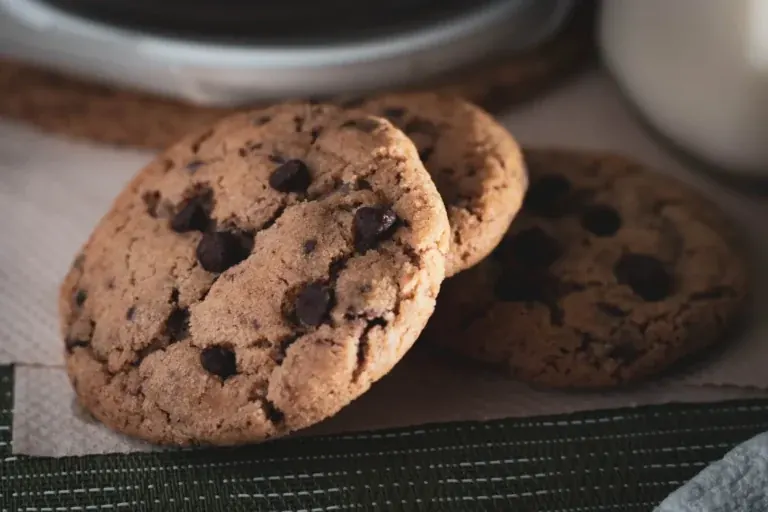
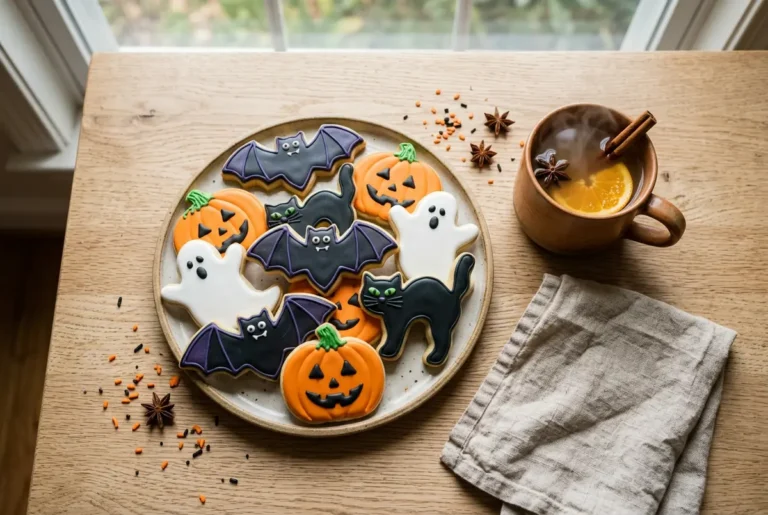
Halloween chocolate cookies are rich, dark cocoa cookies with crackled, shiny tops and a soft, fudgy center, finished off with melted chocolate drizzle and candy eyes for a spooky look. They smell like warm brownie batter while they bake, and the kitchen fills with that deep cocoa scent that signals fall baking is in full swing.
I first made this recipe for a school bake sale and ended up making it three more times that October because my kids kept asking for “the googly eye cookies.” The dough comes together in one bowl, no mixer required, and the cookies hold their shape well enough to decorate however you like.
This is a straightforward, no-fuss cookie recipe built for a busy fall schedule. You get a chewy, chocolatey base that works whether you decorate it simply or go all out with Halloween sprinkles, orange candy melts, and candy eyes.
Quick answer: To make Halloween chocolate cookies, mix melted chocolate and cocoa powder into a butter-sugar base, chill the dough 30 minutes, then bake at 350°F (175°C) for 10-12 minutes until the edges set but the centers look slightly underdone. The one tip that matters most: pull the cookies while the middle still looks soft, since they firm up as they cool on the pan.
Key Takeaways
- Chilling the dough for at least 30 minutes keeps Halloween chocolate cookies from spreading into thin, greasy puddles.
- Bake at 350°F (175°C) for only 10-12 minutes; the centers should still look slightly glossy and soft when you pull the tray.
- Use both cocoa powder and melted chocolate in the dough for a deeper, more bakery-style chocolate flavor.
- Decorate while the cookies are still warm so candy eyes and sprinkles stick without extra glue or icing.
- Store finished cookies in an airtight container at room temperature for up to 5 days, or freeze the dough for up to 3 months.
Halloween Chocolate Cookies: Ingredients and Equipment

Halloween chocolate cookies need just a handful of pantry staples plus a few Halloween-specific extras for decorating. Nothing here is hard to find, and most of it you probably already have in the cupboard.
Ingredients for Halloween Chocolate Cookies
Dry Ingredients
Flour, cocoa powder, baking soda, and a pinch of salt build the structure of these cookies. Using unsweetened cocoa powder instead of relying only on melted chocolate gives the dough a deeper, less sweet chocolate flavor that balances the candy decorations.
Wet Ingredients and Chocolate
Melted butter, brown sugar, granulated sugar, eggs, and vanilla extract make the base soft and chewy. Melted semi-sweet chocolate stirred into the wet ingredients is what gives Halloween chocolate cookies that fudgy, brownie-like bite instead of a dry, cakey texture.
Halloween Mix-Ins and Decorations
Mini chocolate chips, candy eyes, orange candy melts, and Halloween-themed sprinkles turn a plain chocolate cookie into a spooky treat. A little flaky sea salt on top is optional, but it does wonders for cutting the sweetness.
Essential Baking Equipment
- Two baking sheets lined with parchment paper
- A medium and large mixing bowl
- A microwave-safe bowl for melting chocolate
- A cookie scoop (about 1.5 tablespoons)
- A wire cooling rack
- A small piping bag or zip-top bag for drizzling
Ingredient Notes and Substitutions
| Ingredient | What It Does | Substitute |
|---|---|---|
| Cocoa powder | Adds deep chocolate flavor and structure | Dutch-process cocoa for a darker color |
| Semi-sweet chocolate | Creates a fudgy, dense texture | Dark chocolate chips, chopped |
| Brown sugar | Adds moisture and chewiness | Equal amount of white sugar plus 1 tsp molasses |
| Candy eyes | Gives the spooky, decorated look | Mini marshmallows with chocolate chip “pupils” |
| Orange candy melts | Adds a festive drizzle color | White chocolate tinted with orange food coloring |
How to Make Halloween Chocolate Cookies

Halloween chocolate cookies come together quickly once the chocolate is melted and the dough is mixed. Here’s exactly how I make them, step by step, based on four test batches in my own kitchen.
Step 1: Melt the Chocolate and Butter
Melt 4 ounces of chopped semi-sweet chocolate with the butter in 20-second microwave bursts, stirring between each, until smooth. Let the mixture cool for about 5 minutes so it doesn’t scramble the eggs later.
Step 2: Mix the Wet Ingredients
Whisk the melted chocolate mixture with brown sugar, granulated sugar, eggs, and vanilla extract until glossy and slightly thickened, about 1 minute by hand. The mixture should look like thin brownie batter at this point.
Step 3: Add the Dry Ingredients
Sift in the flour, cocoa powder, baking soda, and salt, then fold gently with a spatula just until no dry streaks remain. Overmixing here is the main reason Halloween chocolate cookies turn out tough, so stop as soon as it’s combined.
Step 4: Chill the Dough
Cover the bowl and chill the dough for 30 minutes, or up to 24 hours. On my first batch I skipped chilling and the cookies spread into thin, lacy discs; 30 minutes in the fridge fixed that completely.
Step 5: Scoop and Bake
Scoop 1.5-tablespoon portions onto a parchment-lined sheet, spacing them 2 inches apart, and bake at 350°F (175°C) for 10-12 minutes. The edges should look set and slightly cracked while the centers still look a touch underdone and shiny.
Step 6: Cool on the Pan
Let the cookies rest on the hot baking sheet for 5 minutes before moving them to a wire rack. This short rest lets the centers finish setting without drying out the edges.
Step 7: Decorate
While the cookies are still slightly warm, press on candy eyes and drizzle melted orange candy over the top in thin lines. The residual warmth helps everything stick without needing any extra icing.
| Stage | Visual Cue | Action |
|---|---|---|
| Chocolate melted | Smooth and glossy, no lumps | Let cool 5 minutes before mixing in |
| Dough mixed | Thick, fudgy, no dry streaks | Cover and chill 30 minutes |
| Fresh from oven | Edges set, centers shiny and soft | Rest on pan 5 minutes |
| Fully cooled | Firm, matte surface | Decorate and serve or store |
Tips for Perfect Halloween Chocolate Cookies
Chill the Dough, Don’t Skip It
Thirty minutes in the fridge keeps the butter solid enough that Halloween chocolate cookies bake up thick instead of spreading thin. If your kitchen is warm, chill the scooped dough balls on a tray instead of the whole bowl to save time.
Weigh Your Flour
Scooping flour straight from the bag can pack in up to 20% more than a recipe calls for, which leads to dry, cakey cookies. Spoon the flour into your measuring cup and level it off, or better yet, use a kitchen scale.
Underbake Slightly for a Fudgy Center
Pull the tray when the centers still look a little glossy and soft; they’ll finish setting on the hot pan. This is the same trick I use for my chewy chocolate chip cookies, and it works just as well here.
Use Room-Temperature Eggs
Cold eggs can cause melted chocolate to seize into small hard flecks instead of blending smoothly. Set your eggs out for 20 minutes before baking, or warm them briefly in a bowl of lukewarm water.
Decorate While Warm
Candy eyes and sprinkles stick best to cookies that are still slightly warm and a little tacky on top. If the cookies have fully cooled, a tiny dab of melted chocolate works as glue.
Troubleshooting Common Halloween Chocolate Cookies Problems
Why did my cookies spread too thin?
Thin, greasy cookies usually mean the dough was too warm or the butter was melted instead of just softened. Chill the dough for a full 30 minutes and double-check your oven temperature with a thermometer, since a too-low oven also causes spreading.
Why are my cookies dry and crumbly?
Dry Halloween chocolate cookies are almost always the result of too much flour or overbaking. Measure flour by weight if possible, and pull the tray at 10 minutes if your oven runs hot.
Why didn’t the candy eyes stick?
Candy eyes slide off cookies that have fully cooled and lost their surface tackiness. Press them on within 2-3 minutes of removing the cookies from the oven, or use a small dot of melted chocolate as glue.
Why is my dough too soft to scoop?
Soft, sticky dough means the melted chocolate and butter were still warm when mixed in. Chill the dough for an extra 15 minutes, or run your cookie scoop under cold water between scoops.
Why do the cookies taste bitter?
A bitter edge usually comes from using too much cocoa powder or a very dark chocolate without enough sugar to balance it. Stick to the stated amounts, and choose a semi-sweet chocolate rather than bittersweet if you prefer a milder flavor.
Variations and Storage Tips
Flavor Variations
Halloween chocolate cookies take well to mix-ins like white chocolate chips, chopped peanut butter cups, or crushed sandwich cookies for extra crunch. For a spookier color, swap half the cocoa powder for black cocoa, similar to what I do in my black cocoa Halloween brownies.
Make-Ahead Dough
The dough for Halloween chocolate cookies can be made up to 24 hours ahead and kept covered in the fridge. This actually improves the flavor slightly, since the dry ingredients have more time to fully hydrate.
Freezing Dough and Baked Cookies
Scooped dough balls freeze well for up to 3 months; bake straight from frozen, adding 1-2 extra minutes to the bake time. Baked, undecorated cookies also freeze well in a sealed bag for up to 2 months.
Storing Leftovers Safely
Keep decorated Halloween chocolate cookies in an airtight container at room temperature, away from direct sunlight that could melt the candy decorations. For general guidance on how long baked goods stay safe at room temperature, the FoodSafety.gov guidelines are a helpful reference.
| Method | How Long | How To |
|---|---|---|
| Room temperature | Up to 5 days | Airtight container, layered with parchment |
| Refrigerator (dough) | Up to 24 hours | Covered bowl or wrapped dough log |
| Freezer (dough) | Up to 3 months | Scooped balls frozen flat, then bagged |
| Freezer (baked) | Up to 2 months | Undecorated cookies in a sealed freezer bag |
Recipe Summary
Halloween Chocolate Cookies
Ingredients
Cookie dough
Decorations
Instructions
- Melt the chopped semi-sweet chocolate with the butter in 20-second microwave bursts, stirring between each, until smooth, then let it cool for about 5 minutes.
- Whisk the melted chocolate mixture with the brown sugar, granulated sugar, eggs, and vanilla extract until glossy and slightly thickened, about 1 minute by hand, until it looks like thin brownie batter.
- Sift in the flour, cocoa powder, baking soda, and salt, then fold gently with a spatula just until no dry streaks remain, folding in the mini chocolate chips at the same time.
- Cover the bowl and chill the dough for at least 30 minutes, or up to 24 hours, so the butter firms up and the cookies hold their shape.
- Scoop 1.5-tablespoon portions of dough onto parchment-lined baking sheets, spacing them 2 inches apart.
- Bake at 350°F (175°C) for 10-12 minutes, until the edges look set and slightly cracked while the centers still look a touch underdone and shiny.
- Let the cookies rest on the hot baking sheet for 5 minutes before moving them to a wire rack to finish setting.
- While the cookies are still slightly warm, press on the candy eyes, drizzle melted orange candy melts over the top, and add Halloween sprinkles and a pinch of flaky sea salt if desired.
Notes
- Chill the dough for a full 30 minutes, or chill scooped dough balls on a tray if your kitchen is warm, to keep the cookies from spreading thin.
- Spoon flour into the measuring cup and level it off, or weigh it, since scooping straight from the bag can add up to 20% too much flour.
- Pull the cookies from the oven while the centers still look glossy and soft; they firm up as they cool on the hot pan.
- Decorate within 2-3 minutes of baking so candy eyes and sprinkles stick without needing icing or glue.
- Store decorated cookies in an airtight container at room temperature for up to 5 days, away from direct sunlight.
- Freeze scooped dough balls for up to 3 months and bake straight from frozen, adding 1-2 extra minutes, or freeze baked undecorated cookies for up to 2 months.
Rate this recipe
Be the first to rate this recipe
Conclusion
Halloween chocolate cookies are one of those recipes that look far more impressive than they actually are to make. One bowl, a short chill, and 12 minutes in the oven get you a batch of fudgy, spooky-looking cookies that disappear fast at any fall party.
Once you’ve got the base recipe down, feel free to play with the decorating side, from candy eyes to orange drizzle to crushed cookie “dirt” on top. That’s really the fun part of making Halloween chocolate cookies at home instead of buying them.
Save this one for your next bake sale, classroom treat, or Halloween movie night. It’s simple enough to make with kids and sturdy enough to survive a lunchbox.
Suggestion : Halloween Brownies: Easy Black Cocoa Recipe
FAQ
Can I make Halloween chocolate cookies ahead of time?
Yes, you can make the dough up to 24 hours ahead and keep it chilled in the fridge, or freeze baked, undecorated cookies for up to 2 months. Decorate close to serving time so the candy eyes and drizzle stay fresh-looking.
Why are my chocolate cookies cakey instead of fudgy?
Cakey cookies usually mean too much flour or overbaking. Measure flour by spooning it into the cup and leveling it off, and pull the cookies from the oven while the centers still look slightly soft and underdone.
Do I need to chill the dough for Halloween chocolate cookies?
Yes, chilling for at least 30 minutes is important. It firms up the butter so the cookies hold their shape instead of spreading into thin, greasy circles during baking.
What can I use instead of candy eyes?
Mini marshmallows topped with a single mini chocolate chip make a simple homemade substitute for candy eyes. White chocolate chips with a small dot of melted dark chocolate also work well.
How long do Halloween chocolate cookies stay fresh?
They stay fresh for about 5 days when stored in an airtight container at room temperature. Keep them away from heat or direct sunlight so the candy decorations don’t melt or go dull.
Can I use dark chocolate instead of semi-sweet for this recipe?
Yes, but the flavor will be more intense and slightly less sweet. If you swap in dark chocolate, consider adding an extra tablespoon of sugar to keep the balance similar to the original recipe.
Why did my cookies turn out flat and greasy?
Flat, greasy cookies almost always come from warm dough or melted (rather than softened) butter. Chill the dough for a full 30 minutes before baking, and make sure your oven is fully preheated to 350°F (175°C) before the tray goes in.