
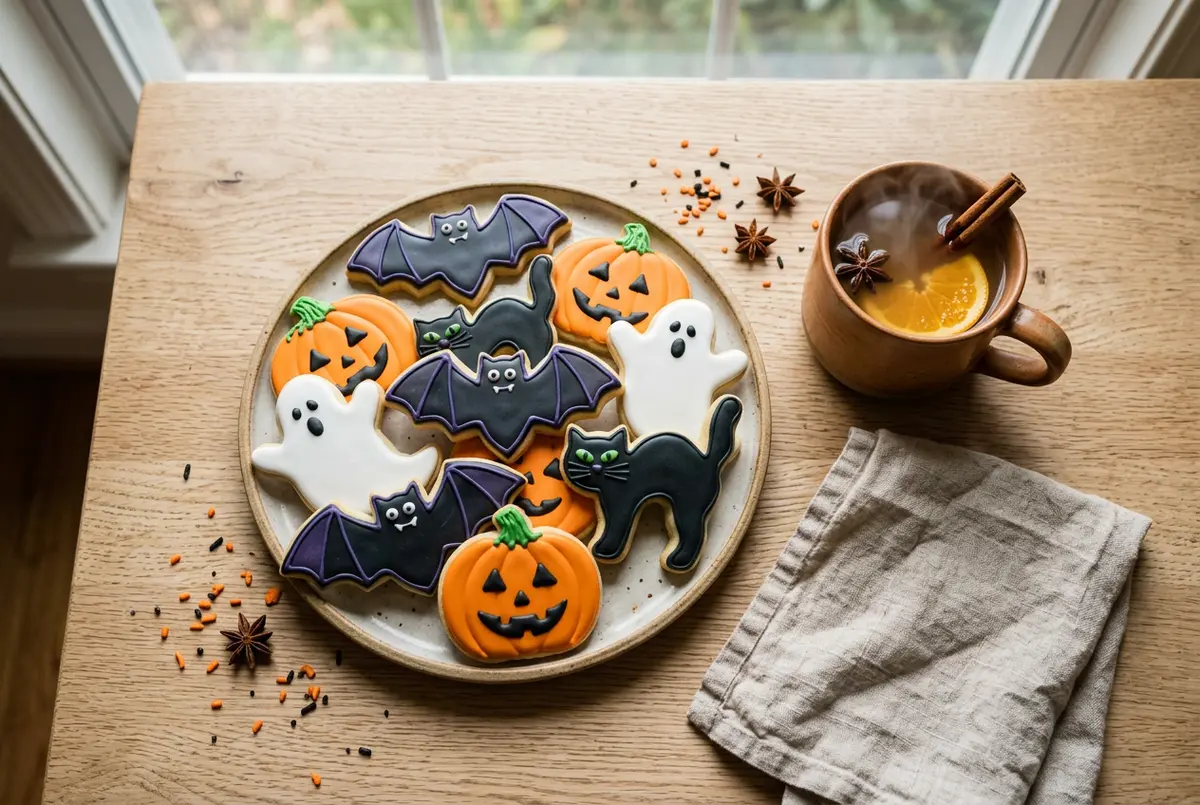
Halloween Sugar Cookies: Easy Spooky Recipe (Makes 24)
Halloween sugar cookies are soft, buttery cutout cookies with crisp edges, rolled and shaped into bats, pumpkins, and ghosts, then finished with colorful royal icing or a simple glaze. The dough smells faintly of vanilla and butter as it bakes, and the kitchen fills with that warm, toasty scent that only happens around late October. Once they’re iced and set, each cookie has a snap on the outside and a tender, slightly chewy middle.
I started making Halloween sugar cookies years ago as a way to use up the plain sugar cookie dough I already loved, just reshaped for the season. The basic cutout technique is the same one bakers have used for generations, and you can read more about the history of the format on Wikipedia’s sugar cookie page if you’re curious where the style came from.
What makes this version work for Halloween is the chilled dough and the decorating step, not any fancy technique. If you can roll out pie dough, you can make Halloween sugar cookies that hold their shape and look sharp on a party tray.
Quick answer: To make Halloween sugar cookies, cream butter and sugar, mix in egg and vanilla, add flour and salt, then chill the dough for at least 1 hour before rolling and cutting shapes. Bake at 350°F (177°C) for 9-11 minutes until the edges are just set. The one tip that matters most: don’t skip the chill, or the cookies will spread and lose their shape.
Key Takeaways
- Chilling the dough for at least 1 hour (or overnight) is what keeps Halloween sugar cookies from spreading into blobs in the oven.
- Bake at 350°F (177°C) for 9-11 minutes and pull the cookies when the edges look set but the centers still look slightly soft.
- Roll the dough to an even 1/4-inch thickness so every cookie bakes at the same rate and none come out burnt or underdone.
- Let cookies cool completely (about 30 minutes) before icing, or the icing will melt and slide off.
- Royal icing dries hard for stacking and shipping, while a simple powdered sugar glaze is faster if you’re decorating the same day.
Halloween Sugar Cookies: Ingredients and Equipment
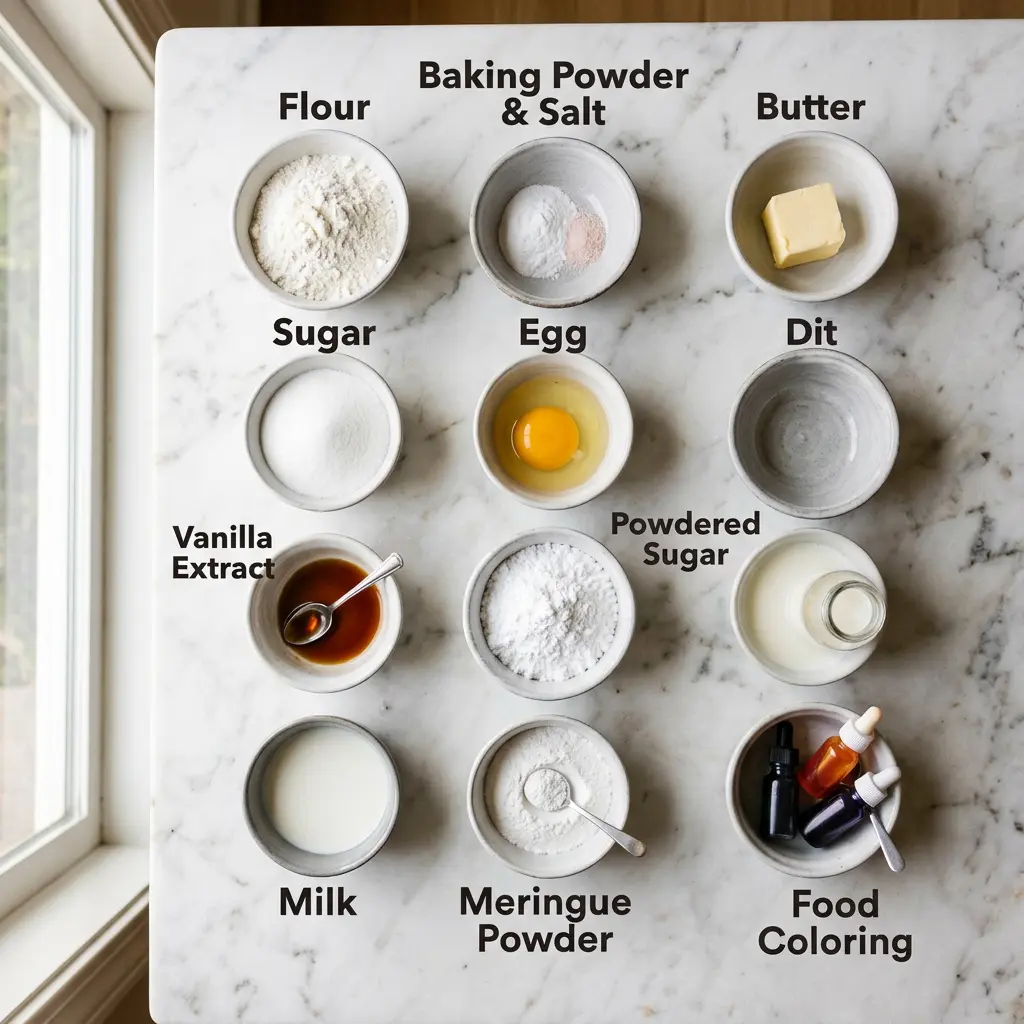
Making good Halloween sugar cookies starts with a short, simple ingredient list, so each one needs to pull its weight. Here’s what goes into the dough and the decorating, and why it matters.
Ingredients for Halloween Sugar Cookies
Dry Ingredients
All-purpose flour gives the cookies structure so your bat and pumpkin shapes hold their outline instead of spreading into puddles. Baking powder adds just a little lift, while a small amount of salt balances the sweetness and keeps the flavor from tasting flat. Measure the flour by spooning it into the cup and leveling it off; scooping straight from the bag packs in too much and makes the dough dry.
Wet Ingredients
Softened butter creamed with granulated sugar is what gives Halloween sugar cookies their tender, slightly crisp texture. One egg adds moisture and helps bind everything together, and vanilla extract (or a mix of vanilla and almond extract) rounds out the flavor. Make sure the butter is truly soft, not melted; cold or melted butter changes how the dough spreads in the oven.
Decorating Ingredients
Powdered sugar, a little milk or water, and vanilla make a simple glaze, or you can use meringue powder and water for royal icing that dries hard. Gel food coloring in orange, black, purple, and green gives Halloween sugar cookies their spooky look without thinning out the icing the way liquid food coloring can.
Essential Baking Equipment
- Stand mixer or hand mixer for creaming the butter and sugar
- Rolling pin, ideally with thickness rings or guides
- Halloween-shaped cookie cutters (bat, pumpkin, ghost, cat)
- Baking sheets lined with parchment paper
- Wire cooling rack
- Piping bags or squeeze bottles with small round tips for icing
- Toothpicks for dragging icing colors into swirls
Ingredient Notes and Substitutions
| Ingredient | What It Does | Substitute |
|---|---|---|
| All-purpose flour | Builds structure so shapes hold | 1-to-1 gluten-free baking flour |
| Unsalted butter | Creates tender, rich crumb | Salted butter (omit added salt) |
| Granulated sugar | Sweetens and helps crisp the edges | Caster sugar |
| Egg | Binds dough and adds moisture | Flax egg (1 tbsp ground flax + 3 tbsp water) |
| Vanilla extract | Adds warm background flavor | Almond extract (use half the amount) |
| Meringue powder | Lets icing dry hard for stacking | Powdered sugar glaze (softer finish) |
How to Make Halloween Sugar Cookies
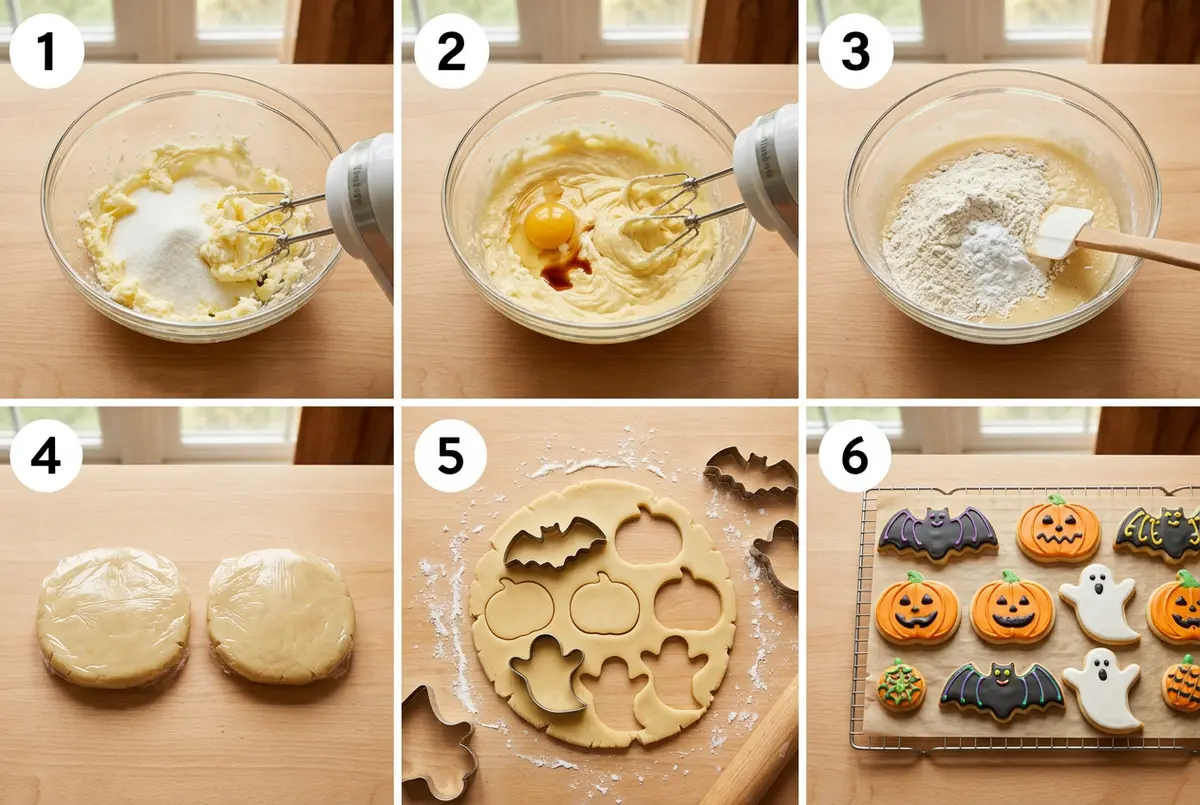
Making Halloween sugar cookies is mostly about patience with the chilling and rolling steps; the baking itself is quick. Here’s the process I use every October, broken into steps you can follow start to finish.
Step 1: Cream the Butter and Sugar
Beat 1 cup (226g) softened butter with 1 cup (200g) granulated sugar on medium speed for about 2 minutes, until the mixture looks pale and fluffy. This step traps air that helps the cookies bake up tender instead of dense. Scrape down the bowl halfway through so nothing sticks unmixed at the bottom.
Step 2: Add the Egg and Vanilla
Mix in 1 large egg and 1 teaspoon vanilla extract until fully combined, about 30 seconds. The batter should look smooth and slightly glossy at this point. If it looks curdled, keep mixing; it will come back together once the dry ingredients go in.
Step 3: Combine the Dry Ingredients
Whisk together 3 cups (375g) flour, 1 teaspoon baking powder, and 1/2 teaspoon salt in a separate bowl, then add it to the wet mixture in two additions on low speed. Stop mixing as soon as no dry streaks remain; overmixing at this stage makes Halloween sugar cookies tough instead of tender.
Step 4: Chill the Dough
Divide the dough into two disks, wrap in plastic, and refrigerate for at least 1 hour, or up to 2 days. Chilling firms up the butter so the cookies hold crisp edges in the oven instead of spreading flat. I’ve skipped this step out of impatience before, and the shapes came out barely recognizable.
Step 5: Roll and Cut the Shapes
On a lightly floured surface, roll one disk to an even 1/4-inch thickness and cut out shapes with Halloween cookie cutters. Space the cutouts about 1 inch apart on a parchment-lined baking sheet, and re-roll scraps once (dough gets tougher with each extra roll).
Step 6: Bake at 350°F (177°C)
Bake for 9 to 11 minutes, until the edges look set and just barely golden but the centers still look soft. Smaller shapes like bats may need closer to 8 minutes, while larger pumpkins can take the full 11. On my second test batch I pulled them at 9 minutes and the centers stayed noticeably chewier, which I preferred.
Step 7: Cool Completely Before Icing
Let the cookies rest on the baking sheet for 5 minutes, then transfer to a wire rack to cool fully, about 30 minutes. Icing melts and slides right off warm cookies, so this step is not optional if you want clean designs.
Step 8: Decorate Your Halloween Sugar Cookies
Outline each shape with thicker icing, let it set for 10 minutes, then flood the center with slightly thinner icing of the same color. Add details like eyes, stems, or stripes once the base layer has dried for about 20 minutes so colors don’t bleed together.
| Stage | Visual Cue | Action |
|---|---|---|
| Creaming | Pale, fluffy, doubled in volume | Stop mixing and add egg |
| Dough after chilling | Firm, holds a dent when pressed | Ready to roll |
| Baking | Edges matte and just set, centers soft | Remove from oven |
| Cooling | Cookie feels cool to the touch | Begin icing |
| Icing outline | Icing holds its shape, no longer shiny | Flood centers |
Tips for Perfect Halloween Sugar Cookies
Weigh Your Flour Instead of Scooping
A kitchen scale takes the guesswork out of Halloween sugar cookies dough. Too much flour, even an extra 2 tablespoons, makes the dough dry and prone to cracking when you roll it out.
Chill the Dough Twice If Needed
If your kitchen runs warm, chill the rolled-out dough (still uncut) on a sheet pan for 10 minutes before cutting shapes, then chill the cutouts again for 10 minutes before baking. This double chill keeps the sharp corners on bats and stars from rounding off in the oven.
Use a Thickness Guide When Rolling
Rolling pin guides or two wooden dowels on either side of the dough keep every cookie exactly 1/4-inch thick, so they all bake evenly. Uneven thickness is the most common reason some cookies in a batch look burnt while others look pale.
Let Icing Rest Before Stacking
Royal icing needs about 6 to 8 hours (or overnight) at room temperature to dry hard enough for stacking or gift bags. If you’re short on time, a thinner glaze sets in about 1 hour but stays a little tacky, so pack those cookies in a single layer.
Borrow Ideas from Other Halloween Treats
If you want more decorating inspiration beyond cookie shapes, my Halloween Brownie Ideas post has several spooky design techniques that translate well to icing Halloween sugar cookies too, like marbled colors and simple piped details.
Troubleshooting Common Halloween Sugar Cookies Problems
Why Did My Cookies Spread and Lose Their Shape?
Warm dough is almost always the cause. If the butter was too soft or the dough didn’t chill long enough, the shapes spread before the structure sets in the oven. Chill the cutouts for 10 minutes on the pan right before baking to fix this.
Why Did the Dough Crack When I Rolled It?
Cracking usually means the dough is too cold and stiff straight from the fridge, or there’s too much flour worked in. Let the dough sit at room temperature for 5 to 10 minutes before rolling, and knead it gently just until it’s pliable.
Why Did My Icing Colors Bleed Together?
Colors bleed when you add details before the base layer has fully set. Wait at least 20 minutes between icing layers, and keep different colors at least a small distance apart until everything firms up.
Why Are My Halloween Sugar Cookies Tough Instead of Tender?
Overmixing after adding the flour develops too much gluten, which makes cookies chewy in a tough, rubbery way rather than a soft way. Mix just until the flour disappears, then stop, even if a few streaks remain and get folded in by hand.
Why Did My Cookies Brown Too Fast on the Bottom?
A dark baking sheet absorbs more heat and can scorch bottoms before the tops finish baking. Switch to a light-colored sheet, or double up two sheets stacked together to insulate the bottom.
Variations and Storage Tips
Flavor Variations
Swap half the vanilla for almond extract for a slightly nuttier background flavor, or add 1 teaspoon of orange zest to the dough for a subtle citrus note that pairs well with the spiced flavors of fall. A tablespoon of unsweetened cocoa powder swapped for flour turns the base into a chocolate version, which looks striking as black cat shapes.
Decorating Variations
Beyond classic orange and black, try a marbled effect by dragging a toothpick through two wet icing colors, or dust finished cookies with edible glitter for a shimmery finish. Simple designs, like a single spiderweb line or two dot eyes, often photograph better than overly detailed ones.
Make-Ahead and Freezing
The dough for Halloween sugar cookies freezes well for up to 3 months; wrap the disks tightly in plastic and thaw overnight in the fridge before rolling. Baked, undecorated cookies also freeze well in an airtight container for up to 3 months, while iced cookies are better stored at room temperature since icing can get sticky after freezing and thawing.
Storing Finished Cookies
Store decorated Halloween sugar cookies at room temperature in an airtight container, separating layers with parchment paper so the icing doesn’t stick. For food safety basics on storing baked goods with eggs and dairy, the guidelines at FoodSafety.gov are a helpful general reference.
| Method | How Long | How To |
|---|---|---|
| Room temperature | Up to 1 week | Airtight container, layered with parchment |
| Refrigerator | Up to 2 weeks | Airtight container, bring to room temp before serving |
| Freezer (baked, undecorated) | Up to 3 months | Airtight container or freezer bag, thaw at room temp |
| Freezer (dough) | Up to 3 months | Wrap disks tightly, thaw overnight in fridge |
How to Decorate Halloween Cookies With Royal Icing
- Tint the icing with gel coloring, not liquid drops, so it doesn’t thin out.
- Pipe a thick outline around each cookie and let it set for about 5 minutes.
- Flood the inside with a thinner icing and nudge it into the corners with a toothpick.
- Let the icing dry completely, usually overnight, before stacking or packing the cookies.
- To get ahead, bake and freeze the plain cookies, then decorate a day or two before your party.
- For a spiced dough that suits the orange and black colors, add 1/2 teaspoon cinnamon and a pinch of nutmeg, or 1 tablespoon orange zest for pumpkin shapes.
Recipe Summary
Halloween Sugar Cookies
Ingredients
Cookie dough
Decorating
Instructions
- Beat 1 cup (226 g) softened butter with 1 cup (200 g) granulated sugar on medium speed for about 2 minutes until pale and fluffy, scraping down the bowl halfway through.
- Mix in 1 large egg and 1 teaspoon vanilla extract until fully combined and smooth, about 30 seconds.
- Whisk together 3 cups (375 g) flour, 1 teaspoon baking powder, and 1/2 teaspoon salt in a separate bowl, then add to the wet mixture in two additions on low speed until no dry streaks remain.
- Divide the dough into two disks, wrap in plastic, and refrigerate for at least 1 hour, or up to 2 days, to firm up the butter.
- On a lightly floured surface, roll one disk to an even 1/4-inch thickness, cut out Halloween shapes, and space them about 1 inch apart on a parchment-lined baking sheet.
- Bake at 350°F (177°C) for 9 to 11 minutes, until the edges look set and just barely golden but the centers still look soft.
- Let the cookies rest on the baking sheet for 5 minutes, then transfer to a wire rack to cool completely, about 30 minutes.
- Outline each shape with thicker icing, let it set for 10 minutes, then flood the center with slightly thinner icing of the same color.
- Add details like eyes, stems, or stripes once the base layer has dried for about 20 minutes so colors don’t bleed together.
Notes
- Chilling the dough for at least 1 hour is essential; skipping it causes the cookies to spread and lose their shape.
- Weigh flour or spoon and level it instead of scooping, since extra flour makes the dough dry and prone to cracking.
- In warm kitchens, chill the rolled dough and cutouts for an extra 10 minutes each before baking to keep sharp edges.
- Dough freezes well for up to 3 months; thaw overnight in the fridge before rolling. Baked, undecorated cookies also freeze for up to 3 months, but iced cookies are best kept at room temperature.
- Royal icing dries hard in 6 to 8 hours for stacking, while a simple powdered sugar glaze sets faster, in about 1 hour, but stays slightly tacky.
- Store decorated cookies at room temperature in an airtight container, layering with parchment paper so the icing doesn’t stick.
Rate this recipe
Be the first to rate this recipe
Conclusion
Halloween sugar cookies don’t need complicated skills, just a chilled dough, an even roll, and a little patience while the icing sets. Once you’ve made a batch or two, the process becomes fast enough to repeat every year without much thought.
Whether you’re baking a small tray for your own kitchen table or a big batch for a classroom party, Halloween sugar cookies are one of those recipes that gets better each time you practice the decorating. Keep the basics in mind, chill, roll evenly, cool fully before icing, and the results will look as good as they taste.
Suggestion : Gingerbread Cookies: Easy Holiday Cutout Recipe (Makes 24)
FAQ
How far in advance can I make Halloween sugar cookies?
Yes, you can make Halloween sugar cookies up to 2 days ahead if you store the dough in the fridge, or bake the cookies up to 1 week ahead and store them undecorated at room temperature. Decorate them the day before your event so the icing has time to fully dry.
Do I need to chill sugar cookie dough before baking?
Yes, chilling for at least 1 hour is necessary to prevent spreading. Cold butter holds the cookie’s shape in the oven, so skipping this step usually means flat, misshapen Halloween sugar cookies with blurred edges.
What is the best icing for Halloween sugar cookies?
Royal icing made with meringue powder is best if you want a hard, stackable finish, since it dries fully in 6 to 8 hours. A simple powdered sugar glaze works too and sets faster, in about 1 hour, but stays slightly softer to the touch.
Why do my sugar cookies lose their shape in the oven?
This happens when the dough is too warm when it goes into the oven. Re-chilling cut shapes for 10 minutes on the baking sheet right before baking keeps the edges crisp and the shapes sharp.
Can I freeze decorated Halloween sugar cookies?
It’s not recommended, since icing can turn sticky or dull once thawed. It’s better to freeze the baked, undecorated cookies for up to 3 months, then thaw and decorate them fresh closer to when you plan to serve them.
How thick should I roll sugar cookie dough?
About 1/4 inch is the standard thickness for Halloween sugar cookies, since it bakes evenly without drying out. Thinner dough bakes faster and crisps up more, while thicker dough stays softer in the center.
What can I use if I don’t have Halloween-shaped cookie cutters?
A butter knife or the rim of a glass works for simple shapes like circles or triangles for cat ears. You can also print a stencil, place it over the rolled dough, and trace around it with a knife for custom Halloween sugar cookies shapes.