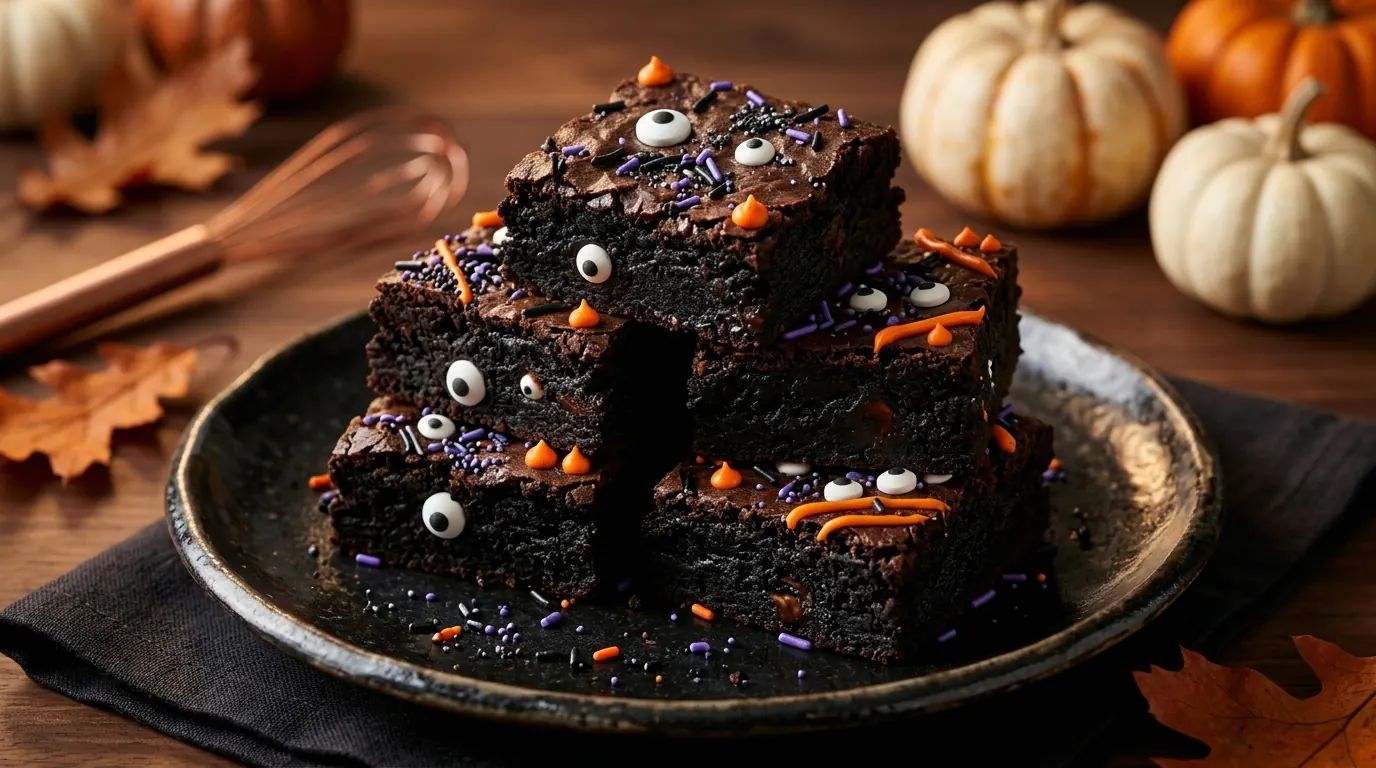
Halloween Brownies: Easy Black Cocoa Recipe (Makes 16)
Quick answer: To make Halloween brownies, melt butter with dark chocolate, whisk in sugar, eggs, and vanilla, then fold in flour, black cocoa, regular cocoa powder, and salt. Bake in a parchment-lined 9×9 inch pan at 350°F (175°C) for 25 to 30 minutes, cool for 1 hour, and decorate with orange frosting, candy eyes, and sprinkles.
When crisp autumn air arrives, you may want a dessert that captures the season without hours in the kitchen. These halloween brownies have a dramatic, midnight-hued look that lifts any dessert table. High-quality black cocoa and rich dark chocolate create a deep, intense flavor profile that satisfies any sweet tooth.
This recipe focuses on a perfectly fudgy texture instead of complex decorating techniques. You need no professional skills to make a treat that looks impressive and tastes decadent. Whether hosting a party or relaxing at home, these spooky brownies blend ease with elegance.
The following sections cover the essential ingredients and simple baking method needed for success. You will also discover creative decoration options, serving suggestions, and the best ways to store your finished batch. Master this festive dessert and bring a touch of dark magic to your kitchen.
Easy Halloween Brownies With Black Chocolate: What Makes Them Special
Turning simple ingredients into a haunting masterpiece is the secret behind these Halloween brownies. You do not need professional baking skills to make spooky brownies that look like they came straight from a gourmet bakery. This recipe stands out among easy halloween brownies recipes because its ingredients create the dramatic look, not complex decorating techniques.
How Black Cocoa and Dark Chocolate Create a Spooky Appearance
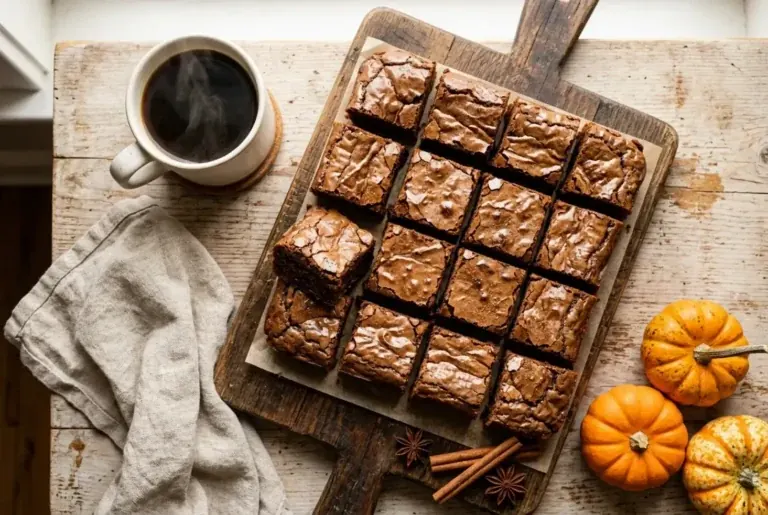
Black cocoa powder creates the deep, midnight-black color. Unlike standard cocoa, it gives your dessert a strikingly dark base. Combined with high-quality dark chocolate, it creates a glossy, rich finish that feels festive.
This combination makes your halloween brownies look sophisticated and mysterious on any platter. Natural cocoa darkness removes the need for heavy food coloring. It offers a clean, effective way to achieve a professional look with little effort.
What You Can Expect From the Flavor and Texture
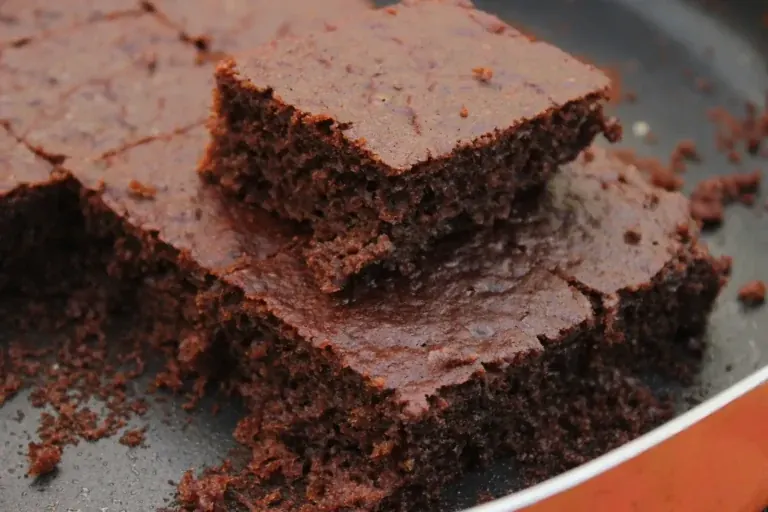
These treats offer a decadent experience for any chocolate lover. Generous melted butter and premium dark chocolate create a dense, fudgy center that melts in your mouth. To keep this texture, avoid overmixing the batter after adding the dry ingredients.
Gentle folding is the secret to maintaining the signature fudgy texture. Careful mixing preserves air pockets, keeping the Halloween brownies moist and rich. Expect a deep, complex chocolate flavor that balances the dark, moody presentation.
Ingredients for Rich, Fudgy Halloween Brownies
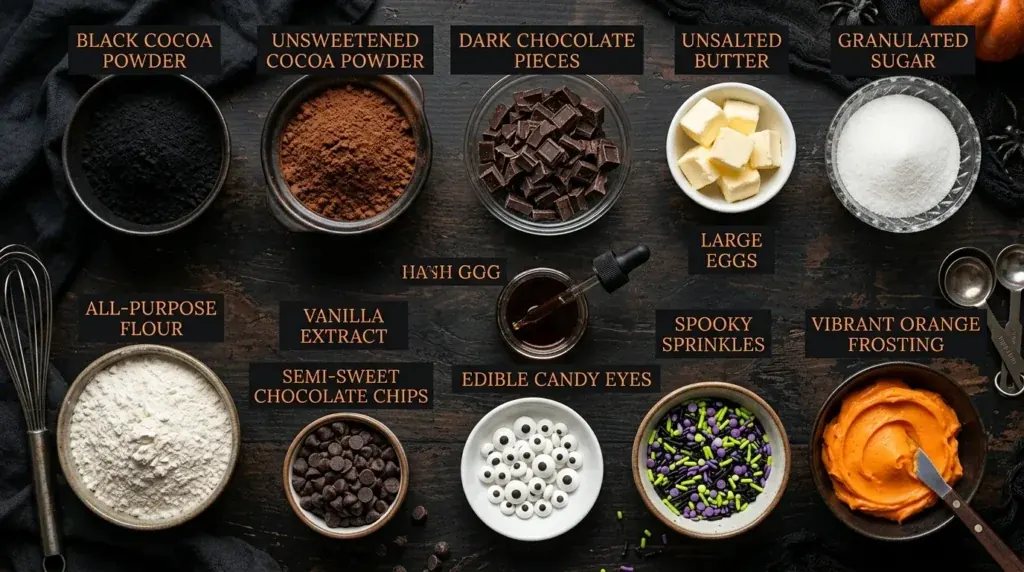
To make spooky treats, start with the right ingredients. The right pantry staples help your halloween brownies bake with deep color and a rich, moist crumb.
Black Chocolate Brownie Ingredients
Black Cocoa Powder, Dark Chocolate, and Unsweetened Cocoa
The cocoa you choose creates the Halloween brownies’ midnight color. Black cocoa powder creates a dark, spooky look without artificial dyes. Unsweetened cocoa deepens the chocolate flavor, while quality dark chocolate adds rich depth.
Butter, Sugar, Eggs, Flour, and Vanilla Extract
These ingredients give the Halloween brownies structure and moisture. Use these items to build your base:
- Unsalted butter for a silky, tender texture.
- Granulated sugar to create that signature crackly top.
- Large eggs to bind the batter and provide lift.
- All-purpose flour for stability.
- Pure vanilla extract to enhance the complex chocolate notes.
Optional Mix-Ins and Halloween Decorations
Chocolate Chips, Candy Eyes, Sprinkles, and Orange Frosting
After mastering the base, customize your chocolate halloween treats for any party theme. Mix-ins and toppings make your presentation more creative. Try these festive additions:
- Semi-sweet chocolate chips for extra pockets of melted goodness.
- Edible candy eyes to give your brownies a fun, monster-like personality.
- Spooky sprinkles in black, purple, or neon green.
- Vibrant orange frosting to create contrast, which is perfect if you are making pumpkin brownies or themed squares.
Essential Tools and Preparation Before You Bake
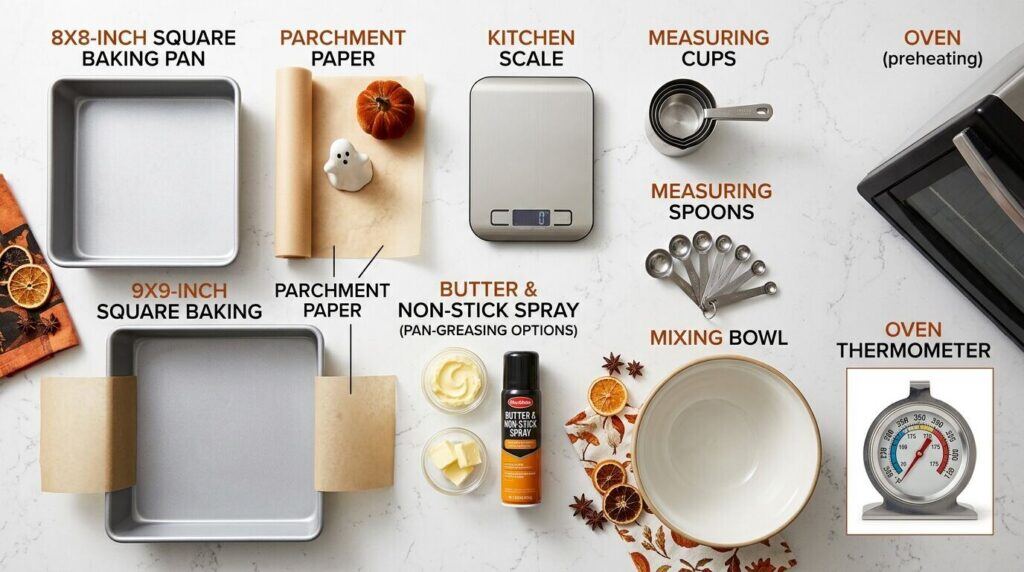
A perfect bake begins before you turn on the oven. Organizing your workspace and choosing proper tools make kitchen time productive and enjoyable.
Choosing the Right Baking Pan
Your pan’s size strongly affects your Halloween brownies’ final texture. A standard 8×8 or 9×9 inch square pan creates a signature fudgy center.
A pan that is too large makes thin, potentially dry brownies. A pan that is too small may bake unevenly, burning edges before the middle sets. Consistency in pan size helps maintain your desired texture.
Preparing the Pan for Easy Brownie Removal
Nobody wants hard work to stick to the pan. Follow these steps so your treats come out cleanly:
- Lightly grease the bottom and sides of your pan with butter or non-stick spray.
- Line the pan with parchment paper, leaving an overhang on two sides.
- Use the parchment “handles” to lift the cooled brownies out of the pan effortlessly.
This simple method helps you cut clean, professional-looking squares every time. It is a small step that greatly improves your final presentation.
Measuring Ingredients and Preheating the Oven
Precision supports all easy halloween brownie recipes. Baking is a science, so use a kitchen scale or level your measuring cups. This keeps your ingredient ratios accurate.
“Baking is a science, and precision is the difference between a good dessert and a great one.”
Always preheat your oven for at least 15 minutes before mixing ingredients. A steady, hot oven helps create the rise and texture of your festive dessert ideas. Once it is ready, focus on creating your spooky treats.
How to Make the Black Chocolate Brownie Batter
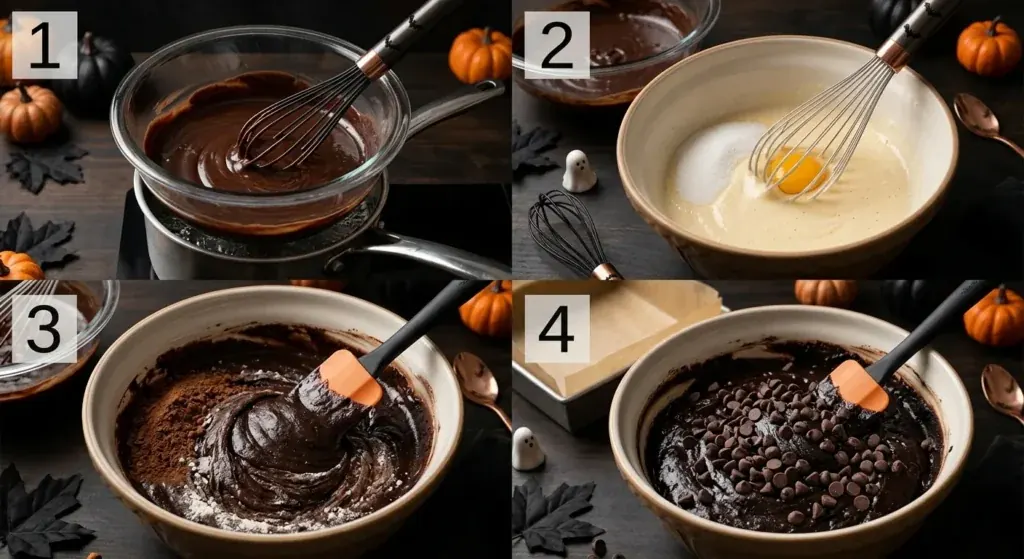
Creating the perfect batter is the secret to mastering easy halloween brownie recipes. Follow the right order to give every bite a rich, professional result.
Melting the Butter and Dark Chocolate Smoothly
Begin by melting butter and high-quality dark chocolate together over low heat. Use a double boiler or microwave in short, ten-second bursts to prevent scorching.
Stir constantly until the mixture becomes silky and glossy. This gentle method protects the cocoa fats and creates deep flavor.
Whisking the Sugar and Eggs for a Fudgy Center
In a separate bowl, whisk sugar and eggs vigorously until pale and slightly thickened. This step adds air and creates the signature fudgy center everyone loves.
Slowly pour the cooled chocolate mixture into the eggs. Whisk until the batter becomes uniform and smooth.
Combining the Dry Ingredients Without Overmixing
Gently fold in flour and black cocoa powder with a rubber spatula. It is crucial to stop mixing when the white flour streaks disappear.
Overworking the batter can create a cake-like texture instead of a dense, fudgy one. Use light, careful movements to maintain its density.
Folding Optional Chocolate Chips Into the Batter
For extra indulgence, fold in a generous handful of chocolate chips. These additions create memorable chocolate halloween treats.
Make sure the chips spread evenly through the thick batter. Your mixture is ready to transfer to the pan for baking.
How to Bake Fudgy Halloween Brownies
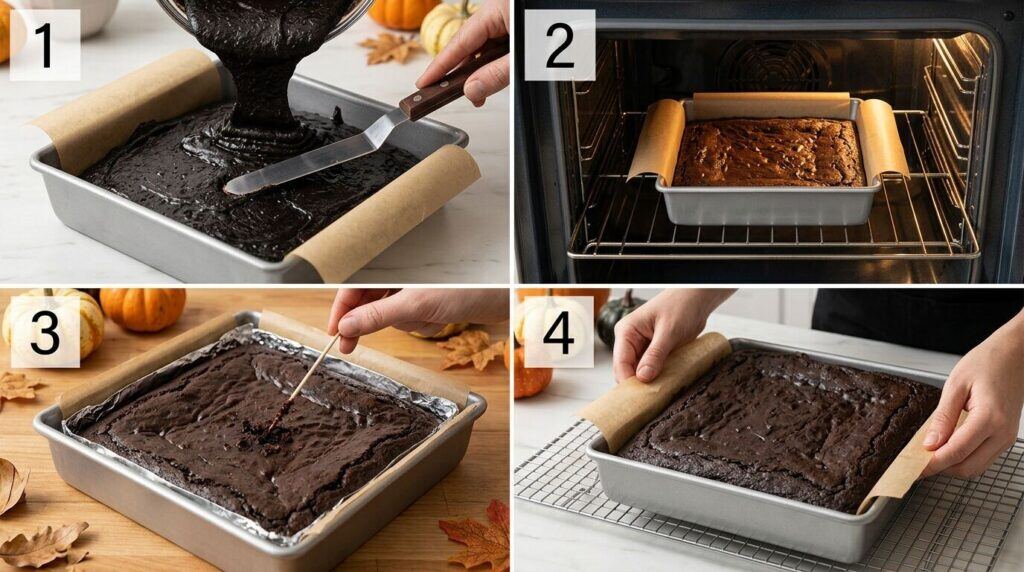
Once the batter is ready, the best Halloween treats begin baking in the oven. Good pan handling and steady heat help create an even texture. These halloween brownies need patience to stay moist and rich.
Spreading the Batter Evenly in the Prepared Pan
Pour the batter into the center of your prepared baking pan. Use an offset spatula to spread it toward the corners and edges. Smoothing the top helps the Halloween brownies bake evenly and prevents thin, burnt edges.
Recognizing the Correct Baking Time and Doneness
Knowing when brownies are done takes practice. Look for set edges that pull slightly away from the pan sides. A toothpick inserted into the center should have a few moist crumbs, not wet batter.
Preventing Dry Edges and an Undercooked Center
To keep a fudgy texture, do not overbake your dessert. If the edges brown too quickly, cover them with a small strip of aluminum foil. Follow these tips for success:
- Rotate your pan halfway through the baking time for even heat distribution.
- Place your rack in the center of the oven to avoid bottom scorching.
- Check the internal temperature if you prefer precision over visual cues.
- Remove the pan immediately once the center is no longer liquid.
Cooling the Brownies Before Slicing and Decorating
Do not cut brownies while they are still hot. The residual heat helps the center finish setting as the pan cools on a wire rack. Once completely cool, brownies will slice into clean squares, making them the best halloween treats for your upcoming party.
Decorating Spooky Brownies for Halloween
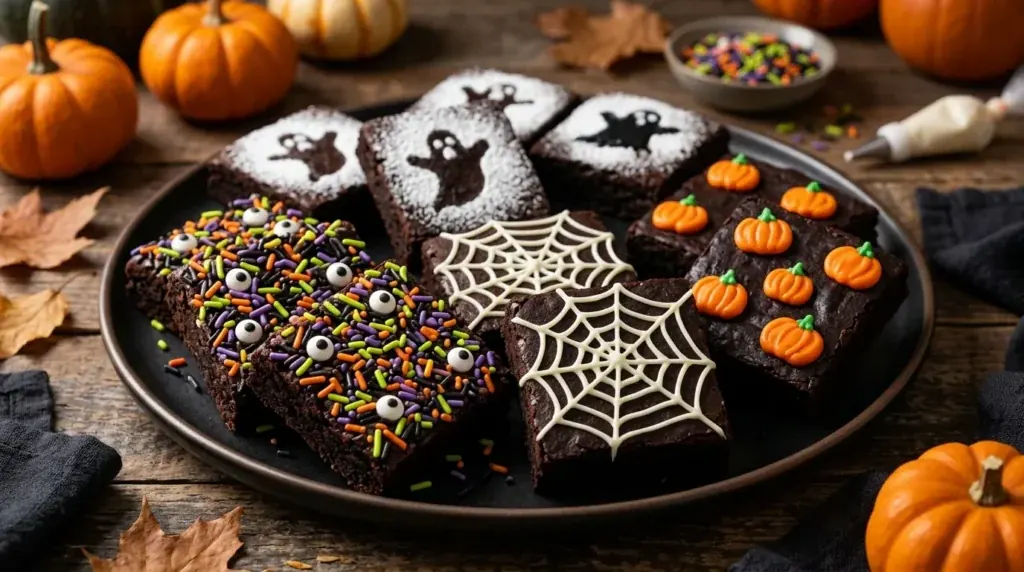
Turn freshly baked treats into spooky brownies and impress your guests with ease. You need no professional piping skills for eye-catching designs and perfect festive dessert ideas at any autumn gathering.
Adding Halloween Sprinkles and Candy Eyes
Store-bought decorations are the easiest way to add personality to your dessert. Press candy eyes into the warm brownie surface right after baking.
Scatter festive Halloween sprinkles across the top for a bright pop of color. These additions make your spooky brownies playful and inviting for children and adults.
Creating Spiderwebs With White Chocolate or Icing
For a classic look, draw a spiderweb pattern on cooled squares. Melt white chocolate chips in a small bag, snip the corner, and pipe concentric circles onto the dark surface.
Drag lines from the center outward with a toothpick to create the web effect. This simple technique adds a polished touch without complex tools.
Making Pumpkin Brownies With Orange and Green Decorations
Turn chocolate squares into pumpkin brownies with colored icing. Pipe small orange circles for the pumpkin body, then add a tiny green stem on top.
These vibrant colors contrast beautifully with the dark cocoa base. They bring traditional autumn themes to your festive dessert ideas.
Using Powdered Sugar and Black Frosting for Simple Designs
For a simple look, use a stencil and powdered sugar to create ghostly shapes. Or use black frosting to write messages or draw simple silhouettes on the Halloween brownies.
These methods work quickly and help your treats stand out on any dessert table. Focus on high-contrast colors for a professional look with little effort.
Ways to Customize These Halloween Brownies
Your kitchen is a perfect laboratory for creating one-of-a-kind seasonal desserts. Adjust a few simple elements to turn standard recipes into impressive chocolate halloween treats for any gathering.
Turning the Recipe Into Peanut Butter Halloween Brownies
Peanut butter pairs well with cocoa, adding a creamy, salty contrast. Drop spoonfuls of smooth peanut butter onto the batter before baking. Use a knife to create a swirled marble effect.
Adding Chopped Nuts, Toffee, or Caramel
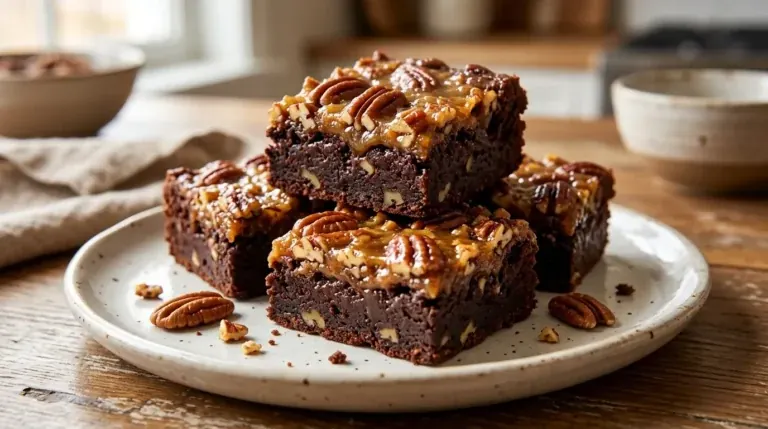
Texture can elevate your baking. Fold in chopped walnuts or pecans for crunch, or sprinkle crushed toffee bits for buttery sweetness. After baking, drizzle thick caramel over the top for a luxurious finish that balances the bitterness of dark cocoa.
Making Richer Chocolate Halloween Treats With Ganache
For a deeper flavor, top cooled squares with dark chocolate ganache. It creates a velvety, concentrated chocolate layer and makes these chocolate halloween treats feel like professional bakery creations.
Adapting the Batter for Smaller Brownie Bites
For a crowd-pleasing option, bake the batter in a mini-muffin tin for bite-sized portions. Decorate these small treats with festive icing or orange and green sprinkles to mimic pumpkin brownies. These bright colors create a fun, seasonal look while keeping the base recipe simple and delicious.
How to Cut, Serve, and Present the Brownies
Clean cuts make desserts look impressive. Prepare your halloween brownies properly, so their appearance matches their rich, dark flavor.
Getting Clean, Even Brownie Squares
Let your Halloween brownies cool completely before slicing them. Warm brownies can turn messy and crumbly, ruining their appearance.
For sharp edges, use a sharp chef’s knife and wipe the blade clean with a damp cloth after every cut. This stops sticky crumbs from dragging across each square.
Serving Brownies at a Halloween Party
When hosting, let your presentation show the season’s festive spirit. Arrange brownies on a decorative platter with themed parchment paper or spooky-colored napkins.
Try these tips for your best halloween treats:
- Use contrasting toppings like orange icing or white chocolate webs to make the black cocoa pop.
- Place individual squares in black or purple cupcake liners for easy grabbing.
- Group them near other themed snacks to create a cohesive dessert table.
Pairing Spooky Brownies With Ice Cream or Whipped Cream
Turn these squares into decadent halloween party desserts with the right accompaniments. A scoop of high-quality vanilla bean ice cream creates a bright contrast with dark chocolate.
For a lighter choice, add a dollop of freshly whipped cream for a luxurious, creamy finish in every bite. Dust it with cocoa powder or orange sprinkles to complete the look for your guests.
Storage, Freezing, and Make-Ahead Instructions
Planning your holiday gathering starts with storing baked goods correctly. Proper methods keep your halloween brownies moist and flavorful after baking.
Keeping Brownies Soft at Room Temperature
For the ideal texture, store undecorated squares in an airtight container at room temperature. This keeps air from drying the crumb and preserves the perfectly fudgy center for several days.
Keep the container away from direct sunlight and heat sources. A cool, dry pantry shelf best preserves their quality.
Refrigerating Decorated Brownies Without Damaging the Topping
If your chocolate halloween treats have perishable toppings, such as cream cheese frosting or fresh whipped cream, keep them chilled. Place them in one layer inside a shallow container to protect delicate decorations.
If stacking is necessary, place parchment paper between the layers. This prevents icing from smearing or sticking to the container above.
Freezing Brownie Squares for Future Halloween Events
Prepare your desserts weeks ahead by using the freezer. Wrap individual squares tightly in plastic wrap, then place them in a heavy-duty freezer bag to prevent freezer burn.
When ready to use them, move the frozen squares to the refrigerator overnight. Slow thawing helps the halloween brownies retain their structure and moisture. For general food storage and safety guidance, see FoodSafety.gov.
Refreshing Brownies Before Serving
For a warm dessert, refresh your treats before the party. A few seconds in the microwave or a brief low-temperature oven stay restores the freshly baked aroma.
- Microwave for 10 seconds on medium power.
- Warm in a 300°F oven for 3 to 5 minutes.
- Allow them to cool slightly before adding any final garnishes.
Common Mistakes When Making Halloween Brownies
Bakers can ruin dessert projects through simple mistakes during mixing or baking. When making spooky brownies, small errors can turn a rich treat into a disappointing one.
Using Too Much Flour or Overmixing the Batter
A perfect brownie depends on its dense texture. Too much flour removes the fudgy center and creates a cake-like texture.
Overmixing is another common problem. Beating the batter too long develops extra gluten, making your spooky brownies tough instead of tender.
Baking the Brownies Until They Lose Their Fudgy Texture
You may want to bake until a toothpick comes out completely clean. For best results, remove the pan when a few moist crumbs still cling to the tester.
Overbaking removes moisture from your spooky brownies, leaving them dry and crumbly. This ruins their rich, chewy texture and lowers dessert quality.
Adding Decorations Before the Brownies Have Cooled
Wait until your treats cool before decorating them. Warm brownies can make frosting or candy eyes slide, melt, or lose their shape.
“Always allow your baked goods to reach room temperature before applying any delicate toppings to ensure a professional and clean finish.”
Handling Black Cocoa and Dark Chocolate Correctly
Black cocoa gives spooky brownies an intense, dark color. However, this dry ingredient can absorb too much liquid without care.
- Measure your cocoa powder by spooning it into the cup rather than scooping.
- Ensure your dark chocolate is melted slowly to prevent seizing.
- Whisk your dry ingredients thoroughly to avoid clumps of dark powder.
- Balance the bitterness of the cocoa with the right amount of sugar.
These steps help your spooky brownies keep their deep, dramatic color and balanced flavor.
Helpful Tips for the Best Halloween Party Desserts
Making the best halloween treats takes creativity and smart kitchen planning. When flavor and presentation work together, your baked goods stand out at any gathering.
Balancing Sweetness With Deep Chocolate Flavor
A sophisticated brownie balances intense cocoa with added sugar. Black cocoa and high-quality dark chocolate create a rich, earthy base that keeps the dessert from tasting too sweet.
This deep flavor lets you add sugary decorations without overwhelming the palate. A pinch of sea salt enhances the chocolate notes and cuts through icing or candy toppings.
Choosing Decorations That Stay Attractive on the Dessert Table
Display your creations so they look fresh throughout the event. In a warm room, avoid toppings that melt quickly, including whipped cream or delicate chocolate curls.
Choose stable decorations that hold their shape. Consider these options for your display:
- Royal icing designs that harden completely.
- Fondant shapes that resist humidity.
- Hard candy eyes or sprinkles that maintain their crunch.
Scaling the Recipe for a Crowd
For a large group, adjust your production schedule. Multiple batches are often easier than doubling one bowl, which can cause uneven mixing.
Use enough baking pans of the same size to keep cooking times consistent. Proper planning lets you rotate pans efficiently, so every guest gets a perfectly baked square.
Making the Brownies Kid-Friendly and Allergy-Aware
When serving festive dessert ideas to a mixed group, focus on safety and access. Check ingredient labels for hidden allergens, such as peanuts or tree nuts, especially in packaged candies.
For younger guests, choose fun, familiar designs. Simple ghosts or pumpkins made with colored icing often beat complex, abstract art. Keeping your halloween party desserts inclusive and easy to eat helps every guest enjoy a delicious, worry-free treat.
More Halloween Brownie Ideas
- Orange and black swirl: scoop about 1/2 cup of batter into a bowl, tint it with gel coloring, dot it over the plain batter and drag a toothpick through for a marbled top.
- Monster eyes: press candy eyeballs into the frosting while it\u2019s still soft.
- Dirt and worms: fold crushed chocolate sandwich cookies into the batter and top with gummy worms after cooling.
- Pumpkin finish: drizzle melted white chocolate tinted orange over the cooled slab.
- Bake the base a day ahead and add candy toppings the morning of the party so they stay crisp.
Recipe Summary
Halloween Brownies With Black Cocoa
Ingredients
Brownies
To decorate
Instructions
- Preheat the oven to 350°F (175°C) for at least 15 minutes. Grease a 9×9 inch pan and line it with parchment paper, leaving an overhang on two sides.
- Melt the butter and dark chocolate slowly in a double boiler or in short microwave bursts, stirring until smooth and glossy. Let it cool for a few minutes.
- Whisk the sugar, eggs, and vanilla into the melted chocolate until the batter looks glossy. This creates the crackly top.
- Whisk the flour, black cocoa, unsweetened cocoa, and salt together, then fold into the batter until just combined.
- Fold in the chocolate chips, if using.
- Spread the batter evenly into the pan, smoothing it into the corners.
- Bake for 25 to 30 minutes, rotating the pan halfway through, until the center is no longer liquid.
- Cool completely in the pan for at least 1 hour, then lift out with the parchment and cut into 16 squares.
- Decorate with orange frosting, candy eyes, and sprinkles once the brownies are fully cool.
Notes
- Spoon the cocoa into the measuring cup instead of scooping, and whisk the dry ingredients well to avoid dark clumps.
- Melt the chocolate slowly so it does not seize.
- Do not decorate until the brownies are completely cool, or the toppings will slide off.
- Take them out as soon as the center is set. Overbaking loses the fudgy texture.
- Store airtight and freeze squares for later. To refresh, microwave for 10 seconds or warm in a 300°F oven for 3 to 5 minutes.
Rate this recipe
5.0 out of 5 (1 rating)
Conclusion
Creating the perfect batch of halloween brownies depends on the deep, dark intensity of black cocoa and high-quality dark chocolate. Together, they create dramatic visual appeal for festive baking projects.
Patience is your best tool during this process. Let treats cool completely for clean slices and a steady surface for creative decorations. This step matters when preparing show-stopping halloween party desserts.
You can transform these fudgy squares into unique masterpieces. Experiment with different candy eyes, icing webs, or seasonal sprinkles to match your event theme. Guests will appreciate the effort behind these rich, decadent snacks.
Gather your favorite ingredients and begin your baking journey today. Simple designs and elaborate toppings both bring magic to any gathering. Enjoy crafting memorable sweets for your next celebration.
Suggestion : Homemade Brownies Recipe in Under 30 Minutes
FAQ
What gives these Halloween brownies such a deep, dark color without using food dye?
King Arthur Black Cocoa gives these spooky brownies their deep, dark color without food dye. This ultra-alkalized cocoa powder creates a naturally dark, nearly black hue. Its sophisticated flavor pairs perfectly with high-quality dark chocolate from brands like Ghirardelli.
Why should I choose this recipe over other easy Halloween brownie recipes?
These easy halloween brownie recipes use high-quality ingredients, including Land O’Lakes butter and melted dark chocolate. They create a dense, fudgy texture without advanced piping skills. The chocolate halloween treats look dramatic because of their rich, black batter.
How do I ensure my brownies are easy to remove and slice for a party?
To make the best halloween treats look professional, line your baking pan with Reynolds Kitchens parchment paper. Leave an overhang on the sides. After the Halloween brownies cool fully, lift them out. Use a sharp knife, wiped clean between cuts, to create uniform squares for your halloween party desserts.
Can I turn this recipe into pumpkin brownies for more variety?
Create pumpkin brownies by swirling Libby’s Pumpkin Purée, cream cheese, and pumpkin spice into the black batter before baking. Or decorate finished squares with orange Wilton Candy Melts for a festive pop of color in your festive dessert ideas.
What is the best way to decorate these brownies if I’m short on time?
For quick and spooky brownies, press Wilton Candy Eyes into the tops while they are still slightly warm. Or use Betty Crocker white decorating icing to pipe simple spiderweb designs across the surface.
How do I avoid making my chocolate halloween treats too dry or cakey?
To maintain a fudgy center, avoid overmixing the batter after adding dry ingredients. Use a Rubbermaid spatula to fold in flour just until combined. Remove the pan when a tester has a few moist crumbs, not when it comes out completely clean.
Can I prepare these festive dessert ideas in advance?
Yes, these halloween brownies are excellent for make-ahead planning. Store them in a Ziploc airtight container at room temperature for several days. You can also freeze undecorated squares for up to three months, making them convenient halloween party desserts.
How can I customize the flavor for guests who like more than just chocolate?
Adapt this recipe by swirling in Reese’s peanut butter for a salty-sweet contrast. You can also add a layer of Kraft caramels and pecans. These simple additions transform the base recipe into unique and best halloween treats that suit everyone’s preferences.